
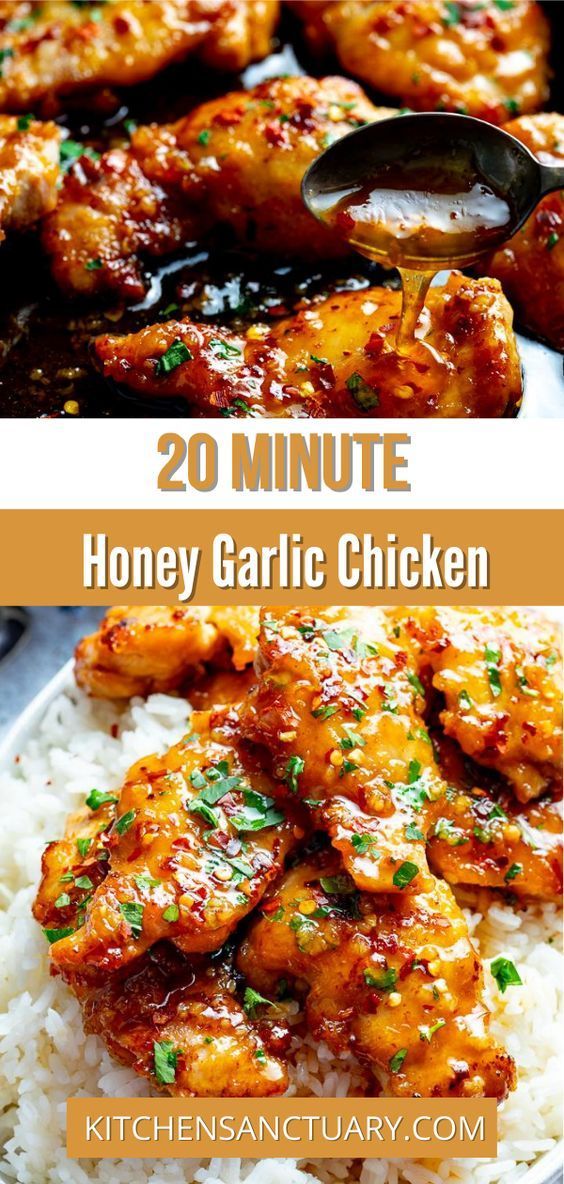
This 20 Minute Honey Garlic Chicken is the recipe I reach for when the clock is against me and everyone is already asking what's for dinner. Boneless chicken thighs get a quick sear until deeply golden, then they finish in a glossy honey garlic sauce that clings to every piece like a warm, sticky glaze.
The magic is in the balance: honey for sweetness, soy sauce and a splash of vinegar for savory tang, and a generous amount of fresh garlic that mellows the moment it hits the hot pan. Everything comes together in one skillet, so the sauce soaks up all the browned flavor left behind by the chicken.
Serve it over steamed rice, tucked into warm tortillas, or piled next to roasted broccoli. It is fast, forgiving, and the kind of dinner that makes a Tuesday feel like a treat.
Why You'll Love This Recipe
About the Ingredients
1.5 lbs (680g) boneless, skinless chicken thighs, cut into 1-inch pieces
Thighs stay juicy under high heat; you can swap in boneless chicken breast, but reduce the sear to 3 minutes per side to avoid drying out. Look for thighs with even thickness so they cook at the same rate.
1 tsp kosher salt
Kosher salt seasons more evenly than fine table salt; if using table salt, use 3/4 tsp. Season the chicken right before searing so it browns instead of steaming.
1/2 tsp black pepper
Freshly cracked pepper has far more aroma than pre-ground. A coarse grind is ideal here so it doesn't burn in the hot pan.
2 tbsp olive oil, divided
Use a neutral oil like avocado or canola if your olive oil smokes easily. You want a high smoke point so the chicken sears golden rather than turning bitter.
6 cloves garlic, finely minced (about 2 tbsp)
Fresh garlic is non-negotiable for this sauce; jarred garlic tastes flat and slightly metallic. Mince it finely so it melts into the glaze instead of burning.
1/3 cup (113g) honey
Clover or wildflower honey gives a clean sweetness; buckwheat honey is too strong here. If your honey is crystallized, warm the jar in a bowl of hot water for a few minutes to loosen it.
3 tbsp low-sodium soy sauce
Low-sodium lets you control the salt level; swap in tamari for a gluten-free version or coconut aminos if you are soy-free. Taste the sauce before adding extra salt.
1 tbsp rice vinegar
Rice vinegar is mild and slightly sweet; apple cider vinegar works as a substitute but is a touch sharper. The acid cuts through the honey so the sauce doesn't taste cloying.
1 tsp cornstarch whisked into 2 tbsp cold water
The slurry is what turns a thin sauce into a glossy glaze. Mix it fresh right before adding, because cornstarch settles quickly at the bottom of the glass.
2 scallions, thinly sliced, plus 1 tsp toasted sesame seeds for garnish
Slice scallions on a bias for a prettier finish; chives work if you are out. Toast sesame seeds in a dry pan for 30 seconds to wake up their nutty flavor.
Tips & Tricks
Do not crowd the pan
Cook the chicken in a single layer so it sears golden instead of steaming; work in two batches if your skillet is smaller than 12 inches.
Mince the garlic, don't smash it
Finely minced garlic dissolves into the glaze, while big chunks burn and turn bitter within seconds in a hot pan.
Whisk the cornstarch slurry fresh
Stir it right before pouring so the cornstarch is fully suspended and thickens the sauce evenly without lumps.
Pull the chicken at 165F (74C)
Carryover heat keeps cooking it after it leaves the pan, so take it off at temperature to keep every bite juicy.
Pro Tips
Step-by-Step Instructions
1. Season the chicken
Pat the chicken pieces dry with paper towels, then toss with the kosher salt and black pepper in a bowl until evenly coated. Let them sit at room temperature while you measure the sauce ingredients so they sear more evenly.
2. Mix the honey sauce
Whisk the honey, soy sauce, and rice vinegar together in a small bowl and set aside. Keep the cornstarch slurry separate until the very end so it doesn't settle into a hard clump.
3. Sear the first batch
Heat 1 tbsp olive oil in a 12-inch skillet over medium-high heat until it shimmers, about 2 minutes. Add half the chicken in a single layer and sear undisturbed for 3 minutes, then flip and cook 2 to 3 minutes more, until golden brown and the internal temperature reads 165F (74C). Transfer to a plate.
4. Sear the second batch
Add the remaining 1 tbsp oil and the rest of the chicken, repeating the 3-minute sear and 2 to 3-minute flip. The pieces should be deeply golden at the edges with no pink remaining at the center.
5. Bloom the garlic
Reduce the heat to medium-low, return all the chicken to the pan, and add the minced garlic. Stir constantly for 30 to 45 seconds, until fragrant and just turning pale gold, being careful not to let it brown.
6. Build the glaze
Pour in the honey-soy mixture and bring it to a gentle simmer, about 1 minute, scraping up the browned bits from the bottom. The sauce should smell sweet and savory with no sharp vinegar bite.
7. Thicken the sauce
Stir the cornstarch slurry once more, then pour it into the pan and simmer for 60 to 90 seconds, stirring, until the sauce coats the back of a spoon and bubbles thickly at the edges. Taste and adjust with a pinch of salt if needed.
8. Garnish and serve
Scatter the sliced scallions and toasted sesame seeds over the top and serve immediately over rice or noodles. The glaze tightens as it cools, so bring the pan straight to the table.
Delicious Variations
Spicy Honey Garlic
Add 1 to 2 tsp sriracha or chili crisp to the honey-soy mixture for a gentle kick that balances the sweetness.
Honey Garlic Salmon
Swap the chicken for four 6-oz salmon fillets, searing skin-side down for 3 minutes and finishing with the same glaze.
- Sheet-Pan Honey Garlic Chicken and Veggies: Toss 3 cups of broccoli florets and sliced bell peppers onto a sheet pan with the seared chicken and glaze, then roast at 425F (220C) for 12 minutes.
How to Store 20 Minute Honey Garlic Chicken
Refrigerator
Store leftovers in an airtight container in the refrigerator for up to 4 days. The glaze thickens when cold, so reheat gently with a splash of water to loosen it.
Freezer
Freeze the cooled chicken and sauce in a freezer-safe container for up to 3 months. Thaw overnight in the refrigerator before reheating to keep the texture intact.
Reheating
Reheat in a skillet over medium-low heat for 3 to 4 minutes with 1 tbsp water, stirring until the glaze loosens and the chicken is hot throughout. Avoid the microwave, which can toughen the chicken.
Frequently Asked Questions
Q: Can I use chicken breast instead of thighs?
Yes, boneless skinless chicken breast works, but reduce the sear to 3 minutes per side so it doesn't dry out. Cut the breasts into 1-inch pieces and pull them at 165F (74C) just like the thighs.
Q: Why did my honey garlic sauce turn bitter?
The garlic most likely burned. Add it over medium-low heat and stir constantly for only 30 to 45 seconds until fragrant and pale gold, then pour in the sauce immediately to stop the cooking.
Q: How do I make the sauce thicker?
Use a cornstarch slurry and let it bubble for a full 60 to 90 seconds so it thickens properly. If the sauce still looks thin, whisk 1/2 tsp cornstarch with 1 tbsp cold water and simmer another minute.
Q: Is this honey garlic chicken gluten-free?
Not as written, because regular soy sauce contains wheat. Swap in tamari or a certified gluten-free soy sauce and the rest of the recipe is naturally gluten-free.
Q: How many calories are in honey garlic chicken?
This recipe has about 285 calories per serving based on six servings, with the sauce included. Serving it over rice will add roughly 200 calories per cup.
If you make this 20 Minute Honey Garlic Chicken, snap a photo and tag me so I can see your glossy skillet. Save the recipe for your next chaotic weeknight and let me know in the comments what you served it with!
20 Minute Honey Garlic Chicken
20 Minute Honey Garlic Chicken delivers sticky, sweet-savory bites of golden seared chicken in a glossy garlic sauce, ready faster than takeout on busy nights.
🧂 Ingredients
- 1.5 lbs (680g) boneless, skinless chicken thighs, cut into 1-inch pieces
- 1 tsp kosher salt
- 1/2 tsp black pepper
- 2 tbsp olive oil, divided
- 6 cloves garlic, finely minced (about 2 tbsp)
- 1/3 cup (113g) honey
- 3 tbsp low-sodium soy sauce
- 1 tbsp rice vinegar
- 1 tsp cornstarch whisked into 2 tbsp cold water
- 2 scallions, thinly sliced, plus 1 tsp toasted sesame seeds for garnish
📋 Instructions
- 1Season the chicken — Pat the chicken pieces dry with paper towels, then toss with the kosher salt and black pepper in a bowl until evenly coated. Let them sit at room temperature while you measure the sauce ingredients so they sear more evenly.
- 2Mix the honey sauce — Whisk the honey, soy sauce, and rice vinegar together in a small bowl and set aside. Keep the cornstarch slurry separate until the very end so it doesn't settle into a hard clump.
- 3Sear the first batch — Heat 1 tbsp olive oil in a 12-inch skillet over medium-high heat until it shimmers, about 2 minutes. Add half the chicken in a single layer and sear undisturbed for 3 minutes, then flip and cook 2 to 3 minutes more, until golden brown and the internal temperature reads 165F (74C). Transfer to a plate.
- 4Sear the second batch — Add the remaining 1 tbsp oil and the rest of the chicken, repeating the 3-minute sear and 2 to 3-minute flip. The pieces should be deeply golden at the edges with no pink remaining at the center.
- 5Bloom the garlic — Reduce the heat to medium-low, return all the chicken to the pan, and add the minced garlic. Stir constantly for 30 to 45 seconds, until fragrant and just turning pale gold, being careful not to let it brown.
- 6Build the glaze — Pour in the honey-soy mixture and bring it to a gentle simmer, about 1 minute, scraping up the browned bits from the bottom. The sauce should smell sweet and savory with no sharp vinegar bite.
- 7Thicken the sauce — Stir the cornstarch slurry once more, then pour it into the pan and simmer for 60 to 90 seconds, stirring, until the sauce coats the back of a spoon and bubbles thickly at the edges. Taste and adjust with a pinch of salt if needed.
- 8Garnish and serve — Scatter the sliced scallions and toasted sesame seeds over the top and serve immediately over rice or noodles. The glaze tightens as it cools, so bring the pan straight to the table.