WordPress Blog
Stretchy Ribbed Crochet Headband Free Crochet Pattern
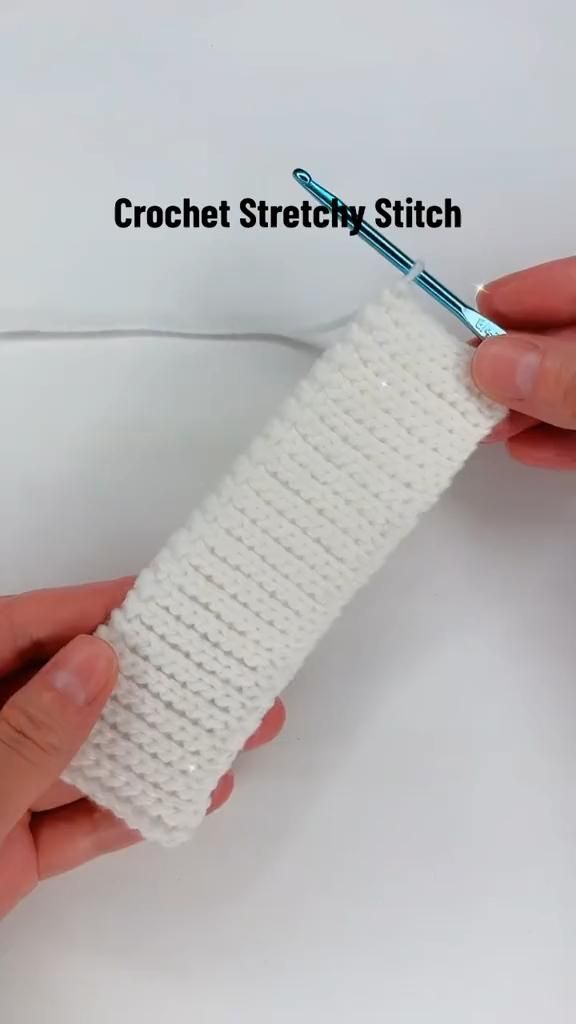
You will crochet a stretchy ribbed headband in one flat strip, then join the ends. It uses only chain and slip stitch, so a confident beginner can finish it in about two to three hours.
Stretchy Ribbed Crochet Headband
Free crochet pattern · US terms
- Yarn
- 4 - Medium (worsted) — suggested
- Hook
- 5.0 mm (H-8) — verify with a swatch
- Gauge
- 12 sts x 14 rows = 4 in (10 cm) in slip stitch rib, unblocked, measured relaxed (calculated, not measured)
- Size
- approx. Adult: about 20 in (51 cm) around unstretched, 2.5 in (6.5 cm) wide. Child: about 18 in (46 cm) around. Both stretch roughly 2 to 3 in (5 to 8 cm) more.
- Level
- Confident beginner
- Time
- about 3 h (estimate)
Written and count-checked on paper, not yet physically tested. Make the gauge swatch and the checkpoint below before you commit all your yarn.
The headband is a narrow band worked flat in slip stitch rib, which gives it side-to-side stretch that hugs the head without a tight fit. You work the strip to your own head measurement, then join the short ends with slip stitch to close the loop.
It suits anyone who wants a quick, low-yarn accessory and anyone practicing even tension in slip stitch. The same method makes a wide ear warmer or a narrow sport band by changing the row count.
Before You Start
Materials
Suggested materials. Any yarn of the same weight works if you match the gauge.
1 skein worsted weight yarn, about 100 g
A smooth worsted in acrylic or a cotton blend holds the rib well and springs back. A soft wool blend is a warm substitute but stretches more with wear.
5.0 mm (H-8) hook
Matches worsted weight for a firm but workable rib. Go down to 4.5 mm (7) if your slip stitches feel loose.
Tapestry needle
Needed to weave in the two yarn tails after joining. A blunt tip passes through the stitch posts without splitting them.
Stitch marker
Marks the first stitch of each row so you do not lose the edge. A scrap of contrasting yarn works the same way.
Tape measure
Used to check the headband length against the wearer's head before joining. Measure the head, then subtract about 1 in (2.5 cm) for stretch.
Yarn needed (estimate): about 55 yd (50 m) for one adult headband; one 100 g skein (about 170 yd / 155 m) makes 2 to 3 headbands
Gauge and Size
Gauge: 12 sts x 14 rows = 4 in (10 cm) in slip stitch rib, unblocked, measured relaxed. This gauge is calculated from the yarn and hook above, not measured on a finished sample. Make a 4 in (10 cm) swatch first; change the hook size, not your tension, until it matches.
Finished size (approximate): Adult: about 20 in (51 cm) around unstretched, 2.5 in (6.5 cm) wide. Child: about 18 in (46 cm) around. Both stretch roughly 2 to 3 in (5 to 8 cm) more.. Your size depends on your gauge.
Abbreviations (US terms)
| Abbr. | Meaning |
|---|---|
| ch | chain |
| sl st | slip stitch |
| st | stitch |
| sts | stitches |
| BLO | back loop only |
| FO | fasten off |
| rep | repeat |
Special Stitches
slip stitch rib (sl st rib)
Work 1 sl st into the back loop only of each st across. Working into the back loop only is what creates the raised ridges and the sideways stretch.
slip stitch join (sl st join)
Hold the two short ends together with right sides facing, insert the hook through both layers, yarn over, and pull through all loops on the hook. Repeat across the two edges to close the band.
How This Pattern Is Written
- All instructions use US crochet terms.
- The headband is worked flat in rows, side to side, so the stretch runs around the head.
- The turning chain does not count as a stitch. Always work the first sl st of a row into the first st of the previous row.
- Every stitch in the strip is worked in the back loop only (BLO), including the first and last stitch of each row, so the ridges and stretch are consistent across the whole band.
- Right side faces you on every row; the rib is reversible, so either side can face out.
- The band is joined with a slip stitch seam at the short ends after you reach your target length.
- Length is measured relaxed. A finished band should be about 1 in (2.5 cm) shorter than the head so it grips without pinching.
The Pattern
Headband Strip
Finishing and Assembly
Sizes and Variations
Child size
work 54 rows instead of 60 for about 17 in (43 cm) relaxed, keeping 12 sts per row.
Wide ear warmer
ch 21 instead of 13 for a 4 in (10 cm) wide band and work the same number of rows.
Two-color band
change color every 10 rows for stripes; carry the unused color loosely up the side and cover it with the seam.
Sport band
use 10 sts per row and add 4 rows for a narrower band that sits lower on the forehead.
Troubleshooting
| What you see | Likely cause | Fix |
|---|---|---|
| The band curls into a tube as you work. | Slip stitch ribs naturally pull inward because the stitches are short and tight. | Lay the strip flat and press it gently with your hands as you go. The curl relaxes after joining and wearing. |
| The rib looks flat with no ridges. | You worked into both loops instead of the back loop only. | Rip back to the last correct row and make sure the hook enters only the back loop, the loop farther from you. |
| The band is too tight on the head. | The relaxed length is shorter than head measurement minus 1 in (2.5 cm), or your gauge is tight. | Remove the seam, add 4 rows, and rejoin. If it is still tight, go up one hook size and rework the strip. |
| The seam shows a bump on the outside. | The short ends were joined with right sides facing inward, pushing the seam to the outside. | Undo the seam and rejoin with the seam on the inside face of the band, or work the seam with a flat sl st join instead of a whipstitch. |
| Stitch count drifts and the edges look uneven. | The first or last stitch of a row was missed, usually the one right after the turning chain. | Place a stitch marker in the first st of each row and count the 12 sts before turning. |
Care
Hand wash in cool water with a mild soap and squeeze gently; do not wring. Lay flat to dry away from direct heat. Do not machine dry, because heat can relax the rib and remove the stretch.
Questions Makers Ask
Why does slip stitch make a stretchy headband?
Slip stitch worked in the back loop only creates short, dense columns that pull apart sideways, which is the direction the band stretches around the head. That sideways give is why the band fits snugly without a tight band of pressure.
How long should a crochet headband be?
Measure the head, then subtract about 1 in (2.5 cm) for the stretch. An average adult head is about 21 to 22 in (53 to 56 cm), so a relaxed band of about 20 in (51 cm) fits most adults.
Can I make this headband without a seam?
Yes. Work the strip as written, then join the short ends with a slip stitch seam and wear the join at the back of the head. A continuous ring is possible but harder to keep flat in slip stitch rib.
What yarn works best for a stretchy headband?
A smooth worsted weight in acrylic or a cotton blend holds the rib and springs back after wearing. Very soft, heavy wools stretch out over time and may need a smaller hook.
Next: Try a matching pair of ribbed fingerless mitts using the same slip stitch rib in a tube.