This 20 Minute Honey Garlic Chicken is the skillet dinner I make when the clock is against me and I still want something that tastes like I tried. Boneless skinless chicken thighs sear until deeply golden, then a four-ingredient honey garlic sauce bubbles down into a glossy glaze that clings to every bite.
The trick is timing: the sauce goes in only after the chicken has a real crust, and it reduces for just two minutes so the honey caramelizes without turning bitter. That short window is what keeps this genuinely a 20-minute recipe rather than a hopeful one.
Serve it over steamed rice, mashed potatoes, or a pile of green beans, and spoon the extra pan sauce right on top. It is fast enough for a Tuesday and good enough that nobody at the table will guess how little effort it took.
Why You'll Love This Recipe
About the Ingredients
1 3/4 lb (800g) boneless skinless chicken thighs (about 6 thighs)
Thighs stay juicy under high heat; if you only have breasts, use 1 1/2 lb and cut the sear time by 1 minute per side so they do not dry out. Look for thighs of even thickness so they cook at the same rate.
3/4 tsp fine sea salt
Fine sea salt dissolves faster than kosher flakes in a quick rub; if using Diamond Crystal kosher, use 1 1/4 tsp. Season the chicken at least 5 minutes before searing for better browning.
1/2 tsp freshly ground black pepper
Fresh-cracked pepper has far more aroma than pre-ground; a coarse grind is ideal here. Skip it entirely if serving very young children and add pepper at the table instead.
1 tbsp neutral oil (canola, avocado, or vegetable)
A high-smoke-point oil is essential because the pan gets very hot; do not substitute butter or extra-virgin olive oil, which will burn before the chicken browns. Avocado oil is the most neutral-tasting option.
5 medium garlic cloves, finely minced (about 1 1/2 tbsp)
Fresh garlic is non-negotiable for the sauce's punch; jarred minced garlic tastes flat and slightly metallic. Mince it finely so it does not scorch in the hot pan.
1/3 cup (80ml) honey
Clover or wildflower honey gives a clean sweetness; buckwheat honey is too strong and will overpower the garlic. If your honey is crystallized, warm the measuring cup in hot water first so it pours cleanly.
3 tbsp (45ml) low-sodium soy sauce
Low-sodium lets you control the salt level; for a gluten-free version, use tamari 1-for-1. Regular soy sauce works but reduce the added salt in the sauce to a pinch.
1 tbsp (15ml) rice vinegar
Rice vinegar's mild acidity balances the honey without sharpness; apple cider vinegar works as a swap but use 2 tsp since it is stronger. Do not use balsamic, which is too sweet and dark.
1/2 tsp red pepper flakes (optional)
Adds a gentle back-heat that keeps the glaze from tasting candy-sweet; Aleppo pepper is a milder substitute. Leave them out for a strictly kid-friendly version.
2 scallions, thinly sliced, plus 1 tsp toasted sesame seeds, to finish
Scallions give freshness and color against the amber glaze; chives or thinly sliced shallot work in a pinch. Toast sesame seeds in a dry pan for 60 seconds to wake up their flavor.
Tips & Tricks
- Dry the chicken thoroughly with paper towels before seasoning. Surface moisture steams instead of sears, and wet chicken will never develop the golden crust that makes this dish.
- Do not add the honey sauce until the chicken is fully browned and the pan is off the heat for a moment. Honey scorches above 350F (177C), so letting the pan cool for 30 seconds before pouring in the sauce prevents a bitter, burnt-garlic taste.
- Watch the glaze, not the clock, during the final reduction. It should coat the back of a spoon and bubble thickly at the edges; if it looks watery, give it 30 more seconds, and if it tightens too fast, splash in 1 tbsp water.
Pro Tips
Step-by-Step Instructions
1. Pat and season
Pat the chicken thighs completely dry with paper towels, then season both sides with the salt and pepper. Let them sit at room temperature for 5 minutes while you mince the garlic and whisk the honey, soy sauce, rice vinegar, and red pepper flakes together in a small bowl.
2. Heat the skillet
Heat a 12-inch skillet over medium-high heat for 2 minutes, then add the oil and swirl until it shimmers. The pan is ready when a drop of water flicked in sizzles and evaporates instantly, roughly 375F to 400F (190C to 205C).
3. Sear the first side
Lay the thighs in the pan smooth-side down, spacing them apart, and cook undisturbed for 5 minutes at 375F to 400F (190C to 205C). They are ready to flip when the edges look opaque and the underside is deep golden brown and releases easily from the pan.
4. Flip and finish cooking
Flip the chicken and cook 4 to 5 minutes more, until the second side is golden and the thickest part registers 165F (74C) on an instant-read thermometer. Transfer the chicken to a plate and set aside; it will finish glazing in the sauce.
5. Bloom the garlic
Reduce the heat to medium-low and add the minced garlic to the hot pan, stirring constantly for 30 to 45 seconds until fragrant and just turning pale gold. Do not let it brown, or the sauce will taste bitter.
6. Add the sauce and reduce
Pour in the honey-soy mixture and stir, scraping up the browned bits, for 2 to 3 minutes at a gentle simmer until the sauce thickens and bubbles thickly at the edges. It is done when it coats the back of a spoon.
7. Glaze the chicken
Return the chicken and any juices on the plate to the pan, turning each thigh to coat in the glaze, and cook 1 minute more at a low simmer so the sauce clings. The glaze should look glossy and sticky, not runny.
8. Finish and serve
Off the heat, scatter the sliced scallions and toasted sesame seeds over the top and spoon the pan glaze over each piece. Serve immediately over rice or vegetables while the glaze is still warm and pourable.
Delicious Variations
Spicy Honey Garlic
add 1 tbsp sriracha or gochujang to the sauce and finish with sliced Fresno chile for a sweet-heat version.
Honey Garlic Chicken Breasts
swap in 1 1/2 lb thin-sliced breasts, sear 3 to 4 minutes per side to 165F (74C), and add 1 tbsp butter to the sauce for richness.
Honey Garlic Chicken Bowls
slice the glazed chicken over jasmine rice with steamed broccoli and a drizzle of the pan sauce for a meal-prep-friendly bowl.
How to Store 20 Minute Honey Garlic Chicken
Refrigerator
Store leftovers in an airtight container in the refrigerator for up to 4 days; keep the sauce with the chicken so it stays moist.
Freezer
Freeze cooled chicken and glaze in a freezer-safe container for up to 2 months; thaw overnight in the refrigerator before reheating.
Reheating
Reheat gently in a covered skillet over medium-low heat with 1 tbsp water for 3 to 4 minutes, or microwave in 30-second bursts, until steaming but not dry.
Frequently Asked Questions
Q: How long do you cook honey garlic chicken?
Cook boneless thighs about 5 minutes per side over medium-high heat, then 1 minute more in the glaze, for roughly 11 to 12 minutes total cooking time. Always confirm 165F (74C) at the thickest point with an instant-read thermometer.
Q: Why did my honey garlic sauce turn bitter?
The honey or garlic burned, which happens when either hits a pan that is too hot for too long. Add the garlic only after lowering the heat to medium-low, and pour in the sauce off the heat for 30 seconds before returning the pan to the burner.
Q: Can I use chicken breasts instead of thighs?
Yes, but use thin-sliced or pounded breasts and shorten the sear to 3 to 4 minutes per side so they do not dry out. Breasts have less fat, so add 1 tbsp butter to the finished sauce for richness.
Q: Is honey garlic chicken gluten free?
Only if you swap the soy sauce for tamari or a certified gluten-free soy sauce, since standard soy sauce contains wheat. Check your honey and vinegar labels too, then the dish is fully gluten free.
Q: Can I make honey garlic chicken ahead of time?
Yes, cook it up to 2 days ahead and store it with the sauce in the refrigerator, then reheat gently with a splash of water. The glaze thickens when cold, so loosen it over low heat rather than high.
Grab your skillet and give this 20 Minute Honey Garlic Chicken a try tonight, then come back and tell me how the glaze turned out. Pin it for your busiest weeknights and share it with the friend who always asks what to make for dinner.
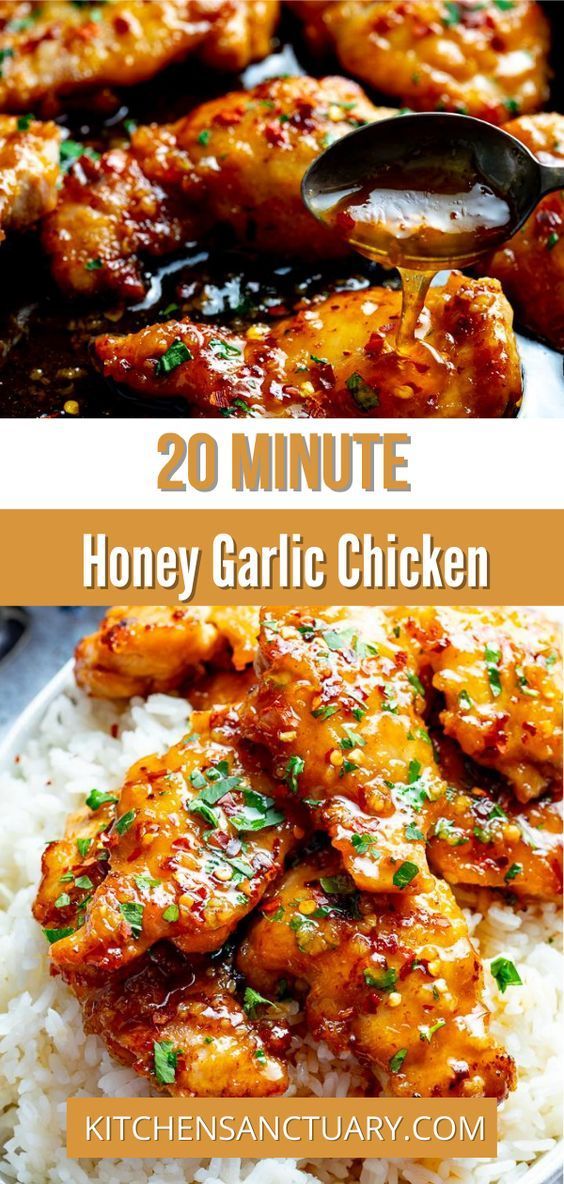
20 Minute Honey Garlic Chicken
20 Minute Honey Garlic Chicken turns juicy pan-seared thighs into a sticky, sweet-savory glaze in one skillet for a fast weeknight dinner.
🧂 Ingredients
- 1 3/4 lb (800g) boneless skinless chicken thighs (about 6 thighs)
- 3/4 tsp fine sea salt
- 1/2 tsp freshly ground black pepper
- 1 tbsp neutral oil (canola, avocado, or vegetable)
- 5 medium garlic cloves, finely minced (about 1 1/2 tbsp)
- 1/3 cup (80ml) honey
- 3 tbsp (45ml) low-sodium soy sauce
- 1 tbsp (15ml) rice vinegar
- 1/2 tsp red pepper flakes (optional)
- 2 scallions, thinly sliced, plus 1 tsp toasted sesame seeds, to finish
📋 Instructions
- 1Pat and season — Pat the chicken thighs completely dry with paper towels, then season both sides with the salt and pepper. Let them sit at room temperature for 5 minutes while you mince the garlic and whisk the honey, soy sauce, rice vinegar, and red pepper flakes together in a small bowl.
- 2Heat the skillet — Heat a 12-inch skillet over medium-high heat for 2 minutes, then add the oil and swirl until it shimmers. The pan is ready when a drop of water flicked in sizzles and evaporates instantly, roughly 375F to 400F (190C to 205C).
- 3Sear the first side — Lay the thighs in the pan smooth-side down, spacing them apart, and cook undisturbed for 5 minutes at 375F to 400F (190C to 205C). They are ready to flip when the edges look opaque and the underside is deep golden brown and releases easily from the pan.
- 4Flip and finish cooking — Flip the chicken and cook 4 to 5 minutes more, until the second side is golden and the thickest part registers 165F (74C) on an instant-read thermometer. Transfer the chicken to a plate and set aside; it will finish glazing in the sauce.
- 5Bloom the garlic — Reduce the heat to medium-low and add the minced garlic to the hot pan, stirring constantly for 30 to 45 seconds until fragrant and just turning pale gold. Do not let it brown, or the sauce will taste bitter.
- 6Add the sauce and reduce — Pour in the honey-soy mixture and stir, scraping up the browned bits, for 2 to 3 minutes at a gentle simmer until the sauce thickens and bubbles thickly at the edges. It is done when it coats the back of a spoon.
- 7Glaze the chicken — Return the chicken and any juices on the plate to the pan, turning each thigh to coat in the glaze, and cook 1 minute more at a low simmer so the sauce clings. The glaze should look glossy and sticky, not runny.
- 8Finish and serve — Off the heat, scatter the sliced scallions and toasted sesame seeds over the top and spoon the pan glaze over each piece. Serve immediately over rice or vegetables while the glaze is still warm and pourable.