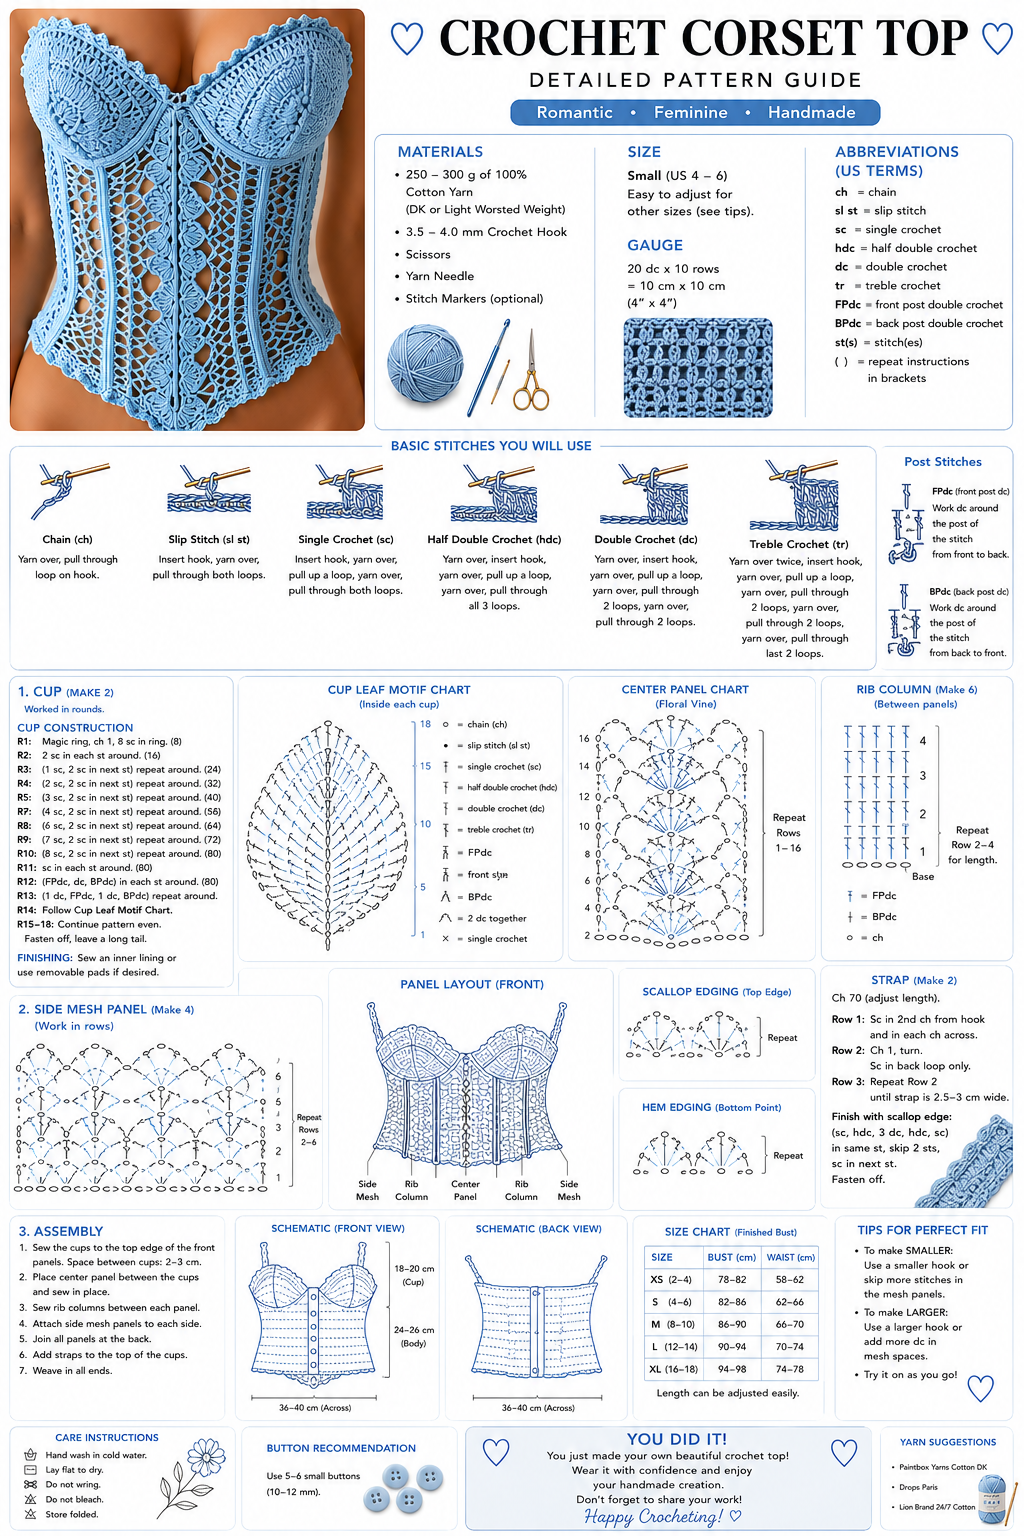
This pattern makes a fitted, lace-up corset top worked as two flat panels with a front lacing gap. It uses single crochet and basic increases, so a confident beginner can finish it in about four to five hours of crochet time.
Lace-Up Crochet Corset Top
Free crochet pattern · US terms
- Yarn
- 3 – Light (DK) or 4 – Medium (worsted) cotton blend — suggested
- Hook
- 4.5 mm (G-7) — verify with a swatch
- Gauge
- 16 sts x 18 rows = 4 in (10 cm) in single crochet, unblocked (calculated, not measured)
- Size
- approx. Approximately 30 in (76 cm) bust circumference at the smallest size, adjustable up to about 40 in (102 cm) with lacing; length about 14 in (36 cm) from underbust to hem. Sizes are calculated from the stated gauge.
- Level
- Confident beginner
- Time
- about 4 h 30 min (estimate)
Written and count-checked on paper, not yet physically tested. Make the gauge swatch and the checkpoint below before you commit all your yarn.
The top is built from two identical-shaped panels: a front-left and a front-right piece that lace together at center front, plus a back panel joined at the sides. Each panel is worked flat in single crochet with shaping at the waist and bust.
The lacing gap lets the wearer adjust the fit, which makes the piece forgiving to size. It suits anyone comfortable with single crochet, counting stitches and simple increases and decreases. No prior garment experience is needed.
Before You Start
Materials
Suggested materials. Any yarn of the same weight works if you match the gauge.
2-3 skeins (about 300-500 yd) DK or light worsted cotton or cotton blend
Cotton holds shape and breathes well for summer wear. A smooth acrylic-cotton blend is a good substitution if you want more stretch.
4.5 mm (G-7) crochet hook
Matches the yarn weight for a firm, non-gaping fabric. Go up one size if your swatch comes out tight.
Tapestry needle
For weaving in ends and sewing side seams. A blunt tip slides through crochet stitches without splitting them.
Stitch markers (4 or more)
Useful for marking the lacing gap edges and side seam points. Scrap yarn works as a substitute.
About 2 yd (1.8 m) of thin ribbon or a crocheted chain cord
For the front lacing. A narrow satin ribbon or a crocheted chain cord both work.
Yarn needed (estimate): Estimated about 300 to 500 yd (275 to 460 m), roughly 2 to 3 skeins of 100 g, depending on size
Gauge and Size
Gauge: 16 sts x 18 rows = 4 in (10 cm) in single crochet, unblocked. This gauge is calculated from the yarn and hook above, not measured on a finished sample. Make a 4 in (10 cm) swatch first; change the hook size, not your tension, until it matches.
Finished size (approximate): Approximately 30 in (76 cm) bust circumference at the smallest size, adjustable up to about 40 in (102 cm) with lacing; length about 14 in (36 cm) from underbust to hem. Sizes are calculated from the stated gauge.. Your size depends on your gauge.
Abbreviations (US terms)
| Abbr. | Meaning |
|---|---|
| ch | chain |
| sc | single crochet |
| sc2tog | single crochet 2 stitches together (decrease) |
| sl st | slip stitch |
| st | stitch |
| sts | stitches |
| rep | repeat |
| FO | fasten off |
Special Stitches
Single crochet 2 together (sc2tog)
Insert hook into the next stitch, yarn over, pull up a loop. Insert hook into the following stitch, yarn over, pull up a loop. Yarn over and pull through all three loops on the hook. Two stitches become one.
How This Pattern Is Written
- All instructions use US crochet terms.
- Each panel is worked flat in rows. Turn at the end of every row except where stated. The turning ch 1 does not count as a stitch.
- Work the first sc of each row into the first stitch, not into the turning chain.
- Right side faces you on odd-numbered rows. The lacing edge is the straight vertical edge of each front panel.
- Front-left and front-right panels are mirror images. The back panel is one rectangle.
- Sizes are written as Small (Medium, Large). Where one number is given, it applies to all sizes.
The Pattern
Front Panel (make 2, one mirrored)
Back Panel
Finishing and Assembly
Sizes and Variations
Longer Fit
Work Rows 2-4 of the front panel and Rows 2-20 of the back panel an extra 6 rows before shaping, adding about 1.5 in (4 cm) of length.
Wider Bust
Add one extra increase row before Row 11 on each front panel, adding 2 sts per panel and about 1 in (2.5 cm) to the bust.
Crocheted Lacing
Replace the ribbon with a chain cord worked in the same yarn, about 60 ch long, for a matching look.
Troubleshooting
| What you see | Likely cause | Fix |
|---|---|---|
| The panel edge curves inward or outward instead of staying straight | An increase or decrease was missed or added on the lacing edge | Count the stitches at the end of each row and compare with the stated count. Rip back to the last correct row and rework. |
| The fabric feels stiff or the top gapes at the bust | The gauge is too tight or the hook is too small | Work a new swatch with a hook one size larger and check the gauge before continuing. |
| The two front panels do not match in size | The second panel was worked with a different tension or a row was skipped | Lay both panels flat and compare row counts. Rework the shorter panel to match. |
| The side seams pucker | The seam was sewn too tightly or the panels were stretched to fit | Undo the seam and re-sew with a looser tension, matching stitch for stitch along the edges. |
Care
Hand wash in cool water with a mild soap and lay flat to dry, reshaping the panels while damp. Do not wring or tumble dry. Steam block lightly to smooth the edges.
Questions Makers Ask
Do I need to know how to read a crochet pattern to make this?
No. Every row gives the stitch count and the exact stitch to work into, so you can follow it row by row. If you can make single crochet and count stitches, you have the skills needed.
How do I know what size to make?
Measure your bust and compare it with the finished size. The lacing gap adds about 10 in (25 cm) of adjustable room, so choose the size closest to your measurement and adjust the gap when you try it on.
Can I use a different yarn weight?
Yes, but the finished size will change. Work a swatch in your chosen yarn and adjust the hook size until you match the gauge, or recalculate the stitch counts from your own gauge.
Is this top suitable for a beginner's first garment?
Yes. It uses only single crochet, simple increases and decreases, and straight seams. The lacing gap hides small fit differences, which makes it a forgiving first garment.
Next: Try a crochet tank top worked in the round to practice joining and working without seams.