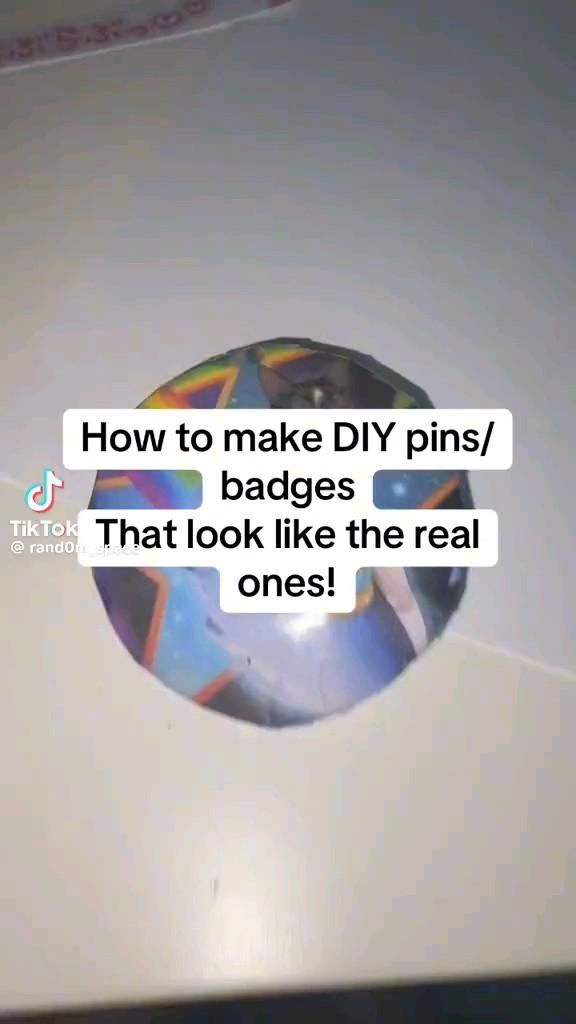
There is a very specific kind of satisfaction in spotting a tiny enamel pin on someone’s denim jacket and realizing it is not enamel at all. It is paper, glue, and a bit of patience — and it looks better than half the merch on the market. The trick is not talent. It is knowing which materials behave like metal-and-resin when they are layered correctly, and which shortcuts turn a badge into a sad, curling square of cardboard.
Below is a full toolkit: the tutorials, supply shops, printable templates, and finishing tricks that make homemade pins and badges read as “real” from a normal conversation distance. Some are beginner-friendly in an afternoon; a few need a laminator or a resin kit. All of them are cheap enough that a failed attempt costs less than a coffee.
Table of Contents(Click to Toggle)
- Why DIY Pins and Badges Are Having a Moment
- The 20 Best DIY Pin and Badge Methods
- 1. Shrinky Dinks
- 2. Resin Coating Over Printed Art
- 3. Bottle Cap Badges
- 4. Button Maker Machines
- 5. Polymer Clay Pins
- 6. UV Resin Domes
- 7. Laminated Paper Badges
- 8. Printable Shrink Plastic Sheets
- 9. Epoxy Stickers
- 10. Perler Bead Pins
- 11. Wooden Blank Pin Bases
- 12. Canva
- 13. Glossy Photo Paper Plus Mod Podge
- 14. Acrylic Blank Charms
- 15. Leather and Faux-Leather Scraps
- 16. Felt Applique Badges
- 17. Cricut Cutting Machines
- 18. Safety Pin and Bead Badges
- 19. Cardstock and Contact Paper
- 20. Upcycled Cereal Box Badges
- Bonus Mentions
- The Best-Kept Crafting Secret on the Internet
Why DIY Pins and Badges Are Having a Moment
Enamel pins are expensive. A single custom pin from a manufacturer usually starts around a dollar or two per unit at a minimum order of fifty, plus a mold fee and weeks of waiting. That math makes no sense if you want one pin of your own cat, one badge for a friend’s birthday, or a small batch for a zine table.
Meanwhile the materials for faking the look have gotten dramatically better. Shrink plastic now comes in printable sheets. UV resin cures in sixty seconds under a cheap lamp. Glossy epoxy stickers mimic a domed enamel surface almost perfectly. The result is a whole genre of crafts where the finished object has that smooth, reflective, slightly raised face that reads as “manufactured” — because the eye only checks for gloss, thickness, and a clean metal-colored edge.
That is the real secret behind every method below: you are not making enamel. You are making gloss, depth, and a crisp border. Nail those three and nobody asks questions.
The 20 Best DIY Pin and Badge Methods
1. Shrinky Dinks : The classic shrink plastic that turns drawings into hard, glossy pins
What it is: The original bake-to-shrink plastic sheets, now sold in printable and frosted varieties alongside the classic rough-and-color version.
Category: Heat-shrink plastic
Why it stands out:
- Sheets shrink to roughly a third of their size and get about nine times thicker, so a flat drawing becomes a rigid tile
- Colored pencil and permanent marker both hold up through the oven
- A quick coat of clear nail polish or resin on top gives it the domed enamel shine
Best for: Hand-drawn art, tiny text, and anyone who wants a pin in under an hour with no special tools beyond an oven and a hot glue gun for the back.
2. ArtResin : Pour-on epoxy that gives printed art a genuine domed enamel face
What it is: A two-part epoxy resin marketed for artwork, with a self-leveling formula that cures clear and non-yellowing.
Category: Coating resin
Why it stands out:
- Self-leveling means it naturally forms the raised dome that real enamel pins have
- Works over printed paper, clay, wood, and shrink plastic
- One kit coats dozens of small pins, so the per-pin cost drops fast
Best for: Makers who want the most convincing enamel look and do not mind a 24-hour cure time and careful measuring of the two parts.
3. PinMart : Bottle cap blanks and bar pins for sturdy, metal-rimmed badges
What it is: A badge and pin supplier selling crimp-style bottle cap blanks, bar pins, and butterfly clutches in bulk.
Category: Pin hardware
Why it stands out:
- The crimped metal rim does the hard work — it reads instantly as a manufactured pin edge
- You can glue in a printed circle, a fabric scrap, or a photo and cover it with a clear epoxy dome
- Bar pins hold better on denim than butterfly clutches, which is a real problem with heavy clay pins
Best for: Beginners who want a metal edge without any metalwork, and anyone making a run of identical badges for an event.
4. American Button Machines : A press that turns any printed circle into a professional badge
What it is: Button-making presses and supplies, from small hand-crank models to high-volume machines, plus a free online design tool.
Category: Badge press
Why it stands out:
- A single press produces a finished, wrapped-edge button in about five seconds
- Mylar covers give the glossy, slightly domed surface that mimics enamel
- Pin-back and magnet-back parts are interchangeable in the same machine
Best for: Anyone making more than twenty badges, or crafters who also want magnets, mirrors, and keychains from the same press.
5. Sculpey : Oven-bake polymer clay for thick, sculpted, genuinely dimensional pins
What it is: The best-known brand of polymer clay, sold in dozens of colors plus translucent and metallic effects.
Category: Modeling clay
Why it stands out:
- Bakes in a home oven at low temperature, so no kiln is needed
- Holds fine detail like tiny lettering and thin outlines better than air-dry clay
- A coat of gloss varnish or UV resin on top gives it the enamel shine
Best for: Character pins, food-shaped pins, and anything where you want real three-dimensional depth rather than a flat printed face.
6. UV Resin Kits : Sixty-second curing that makes doming fast and mess-free
What it is: Single-part resin that hardens under UV or LED light, sold in squeeze bottles with a small curing lamp.
Category: Coating resin
Why it stands out:
- No mixing ratios to get wrong, which is the number one cause of sticky, uncured epoxy
- Cures in about a minute, so you can build a pin in stages without waiting overnight
- The bottle tip lets you place a precise dome on a small shape without a pipette
Best for: Small pins and quick batches. Note the limitation: UV resin yellows faster than two-part epoxy in direct sunlight, so keep finished pins out of long sun exposure.
7. Scotch Laminating Pouches : The cheapest route to a glossy, sealed paper badge
What it is: Standard thermal laminating pouches used in any home laminator.
Category: Sealing and finishing
Why it stands out:
- Laminating both sides seals the paper so it survives rain, sweat, and pocket lint
- Leaving a clear border around the artwork creates a fake “epoxy edge” that reads as a dome
- A laminator costs less than a single batch of custom pins
Best for: Classroom projects, zine merch, and high-volume badges where speed matters more than a perfect dome.
8. Grafix Shrink Film : Printable shrink sheets that let you skip the hand-drawing step
What it is: Inkjet-printable shrink plastic film, including a frosted version designed to take printer ink cleanly.
Category: Heat-shrink plastic
Why it stands out:
- Print a full sheet of designs, bake, and cut out a dozen pins in one session
- Colors intensify as the plastic shrinks, so printed art comes out more saturated
- Works with both inkjet and, on some lines, laser printers
Best for: Digital illustrators who want to turn a drawing into physical pins without redrawing anything by hand.
9. Epoxy Stickers : Peel-and-stick domes that instantly fake an enamel finish
What it is: Clear, raised, self-adhesive epoxy dots sold in round and square shapes in craft stores.
Category: Finishing
Why it stands out:
- No resin, no curing, no smell — you press it onto printed art and you are done
- The dome is uniform, which is hard to achieve with poured resin on tiny shapes
- Cheap enough to keep a sheet in a drawer for last-minute gifts
Best for: Absolute beginners and kids’ crafts. The catch: sizes are fixed, so your artwork has to be designed around the sticker dimensions.
10. Perler Beads : Pixel-art pins with a chunky, retro, unmistakably handmade look
What it is: Fusible plastic beads that melt together when ironed, available in dozens of colors and specialty finishes.
Category: Fused bead craft
Why it stands out:
- Ironing both sides gives a flatter, denser tile that looks more like a manufactured pin
- Perfect for pixel art, game sprites, and simple icons
- Beads are inexpensive and reusable if a design goes wrong
Best for: Retro and gaming pins. Be aware these are chunkier and lighter than a real enamel pin, so use a strong pin back.
11. Etsy Pin Blanks : Pre-made wooden and metal bases that need only your artwork
What it is: A marketplace where small sellers offer laser-cut wooden discs, acrylic rounds, and metal bezels with pin backs already attached.
Category: Pin hardware
Why it stands out:
- You skip the entire structural problem and only design the face
- Bezels with a raised rim are ideal for pouring resin without it running off the edge
- Blanks come in custom shapes, so you can match a specific silhouette
Best for: Makers who want a clean, professional base and would rather spend their time on the artwork.
12. Canva : Free design templates sized perfectly for pin circles
What it is: A browser-based design tool with thousands of templates, icons, and fonts, usable free.
Category: Design software
Why it stands out:
- You can set a custom canvas to an exact pin diameter and add a bleed margin
- Duplicate-page feature lets you lay out a whole sheet of designs for printing at once
- Export as a print-ready PDF or high-resolution PNG
Best for: The design stage of every method on this list. The free tier is plenty for pin artwork; you only need Pro for background removal on complex images.
13. Mod Podge : The glue-and-seal workhorse for glossy paper badges
What it is: A decoupage medium that seals, glues, and finishes in one product, available in gloss and matte.
Category: Sealing and finishing
Why it stands out:
- The gloss version builds a genuinely shiny surface with a few thin coats
- It seals inkjet prints so they do not smudge when handled
- Works as the adhesive when layering paper onto a blank base
Best for: Paper-based badges. Use thin coats — thick layers stay tacky and can wrinkle the paper underneath.
14. Fire Mountain Gems : Acrylic blanks and bezels for a clean, modern pin silhouette
What it is: A long-running jewelry supply house selling acrylic shapes, bezel settings, pin backs, and adhesives.
Category: Pin hardware
Why it stands out:
- Clear acrylic rounds can be glued over printed art for an instant glass-like dome
- Huge range of bezel sizes, including ovals and hexagons that plain button presses cannot do
- Bulk pricing makes repeat batches affordable
Best for: Non-circular pins and anyone who wants a glassy top layer without mixing resin.
15. Tandy Leather : Leather scraps for heavyweight, textured badge backs
What it is: A leathercraft supplier with scrap bags, stamps, and finishing products.
Category: Leather craft
Why it stands out:
- Leather gives a pin real weight and a matte texture that contrasts nicely with a glossy center
- Scrap bags are cheap and yield many small badges
- Edges can be burnished or painted a metallic color to mimic a metal rim
Best for: Rustic, vintage, and outdoor-themed pins. Leather is thicker, so use a long-pronged pin back.
16. Ben Franklin Crafts : Felt and embroidery supplies for soft, stitched badges
What it is: A craft retailer carrying felt sheets, embroidery floss, and hand-sewing notions.
Category: Textile craft
Why it stands out:
- Felt does not fray, so you can cut any shape without hemming
- Blanket stitch around the edge reads as a deliberate, finished border
- Layering two felt colors creates depth without any resin or coating
Best for: Cozy, cottagecore, and nature pins. These are soft rather than glossy, so they sell the handmade charm instead of the enamel illusion.
17. Cricut : Cutting machines that turn sheets into dozens of identical pin faces
What it is: Desktop cutting machines that cut paper, vinyl, cardstock, and thin leather from a digital design.
Category: Cutting machine
Why it stands out:
- Perfect repeatability — every badge in a batch is the exact same size and shape
- Print-then-cut lets you print artwork and have the machine cut precisely around it
- Handles intricate outlines that are painful to cut by hand with scissors
Best for: Batch production and complex silhouettes. It is a real investment, so it makes most sense if you already own one or plan to sell.
18. Michaels : Safety pins and beads for the fastest badge on this list
What it is: A national craft chain carrying safety pins, seed beads, letter beads, and jewelry wire.
Category: Bead craft
Why it stands out:
- Threading letter beads onto a safety pin makes a wearable, readable badge in about two minutes
- No glue, no oven, no curing — ideal for a group activity
- Beads come in metallic finishes that catch light like enamel does
Best for: Kids, parties, and quick name badges. It is the least “enamel-like” option here, but it is by far the fastest.
19. Blick Art Materials : Cardstock and contact paper for a no-tool, no-heat badge
What it is: An art supply retailer stocking heavy cardstock, clear contact paper, and archival adhesives.
Category: Paper craft
Why it stands out:
- Clear contact paper over printed cardstock creates a smooth, sealed, slightly glossy face
- Heavyweight cardstock keeps the badge from bending in a pocket
- Everything is available in one trip and requires zero equipment
Best for: Last-minute projects and anyone testing a design before committing to a bigger batch.
20. Instructables : Upcycled cereal box badges and endless step-by-step variations
What it is: A community tutorial site with thousands of user-written how-tos, including a deep archive of badge and pin projects.
Category: Tutorials and inspiration
Why it stands out:
- Cereal box cardboard plus a printed label and a clear dome makes a free, surprisingly solid badge
- Every project lists exact materials and photos, so you can copy the method precisely
- Comment sections often contain fixes for problems the original tutorial missed
Best for: Zero-budget crafting and troubleshooting when a technique from this list is not cooperating.
Bonus Mentions
r/EnamelPins : A community that critiques finishes and shares material experiments
Useful for reverse-engineering why a commercial pin looks the way it does, and for honest feedback on your own doming attempts.
YouTube Tutorial Channels : Watch the doming process before you buy resin
Seeing someone pour resin on a tiny shape in real time prevents a lot of wasted material and sticky countertops.
Digital Sketching Apps : Draft pin designs at exact print size before cutting
Designing at true scale on a tablet catches problems — text too small, lines too thin — that only appear once the pin is physical.
Dollar Store Craft Aisles : Cheap pin backs, glue, and clear nail polish
Clear nail polish is a legitimate gloss topcoat for small pins and costs a fraction of a resin kit.
Small-Batch Pin Sellers on Etsy : Study the real thing to copy the finish
Buying one genuine enamel pin and examining its edge, dome height, and back hardware is the fastest way to understand what you are imitating.
The Best-Kept Crafting Secret on the Internet
Every method above comes down to the same three-part illusion. Gloss on top, thickness in the middle, and a crisp defined edge. Shrink plastic and resin get you there with heat and chemistry. Epoxy stickers and laminating pouches get you there with almost no skill at all. Beads, felt, and leather get you there by leaning into texture instead of faking enamel.
Start with the cheapest option that matches your tools. If you own an oven, printable shrink film is the best first attempt because it teaches you how much a design shrinks and how much detail survives. If you own nothing, cardstock and contact paper will still produce something you would actually wear. Then upgrade one variable at a time — a better dome, a stronger pin back, a cleaner cut — and the results compound fast.
The whole point is that you do not need a manufacturer, a mold fee, or a fifty-piece minimum to have a pin that looks like it came from a designer’s table. You need a printer, a coating, and about an hour.
Which method are you trying first — and have you found a material or trick that fakes the enamel look even better? Drop it in the comments so the next person can skip the failed attempts.